Install TenLens.
Download and install TenLens on macOS and Windows. Per-user installs, signed binaries, and no admin rights required for a personal setup.
TenLens installs per user under your profile on both macOS and Windows. You do not need administrator rights for a standard personal install, and your directory data stays on your machine.
Before you start
You will need:
- A Mac running macOS 12.0 or later, or a PC running Windows 10 or 11 (x64)
- Around 200 MB of free disk space
- Outbound HTTPS access to download the installer (and, on Windows, WebView2 if it is not already present)
Download the installer for your platform from the product page. Builds are signed and notarized on macOS and Authenticode-signed on Windows.
macOS
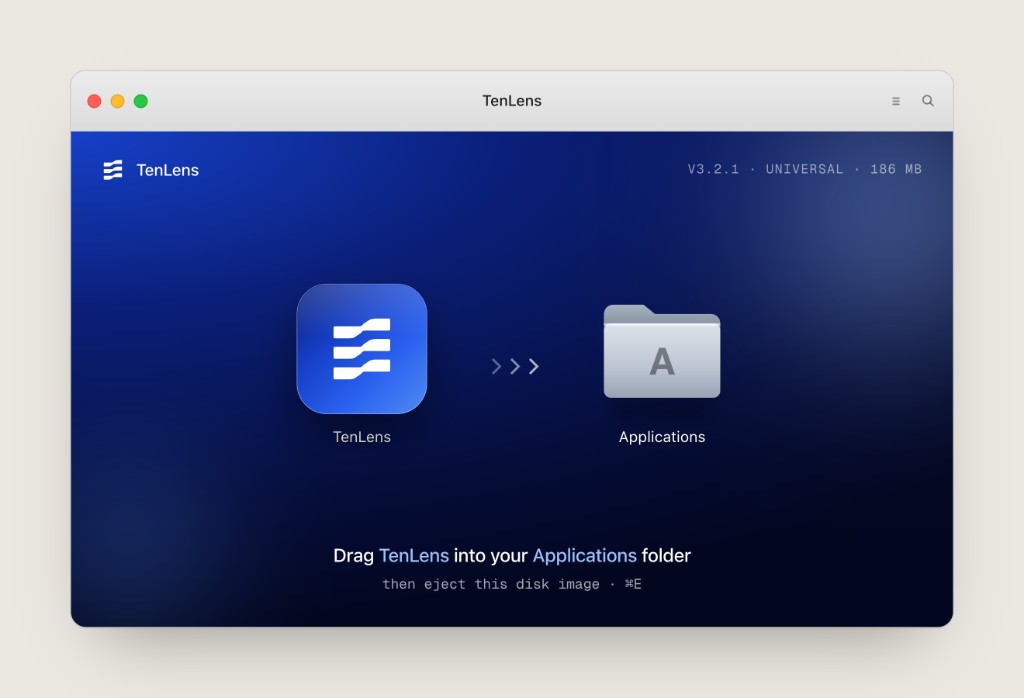
TenLens ships as a .dmg disk image. Installation is drag-and-drop: no separate setup wizard.
- 1Open the disk image
Double-click
TenLens_<version>_universal.dmg(or the ARM64 build for Apple Silicon-only downloads). macOS mounts the disk image and opens the install window. - 2Drag TenLens to Applications
Drag the TenLens app icon onto the Applications folder alias, then eject the disk image (⌘ + E).
- 3Open TenLens
Launch TenLens from Applications or Spotlight. On first open, macOS may ask you to confirm the app is from an identified developer. Choose Open to continue.
Where files live
- Application:
/Applications/TenLens.app - User data:
~/Library/Application Support/TenLens
Windows
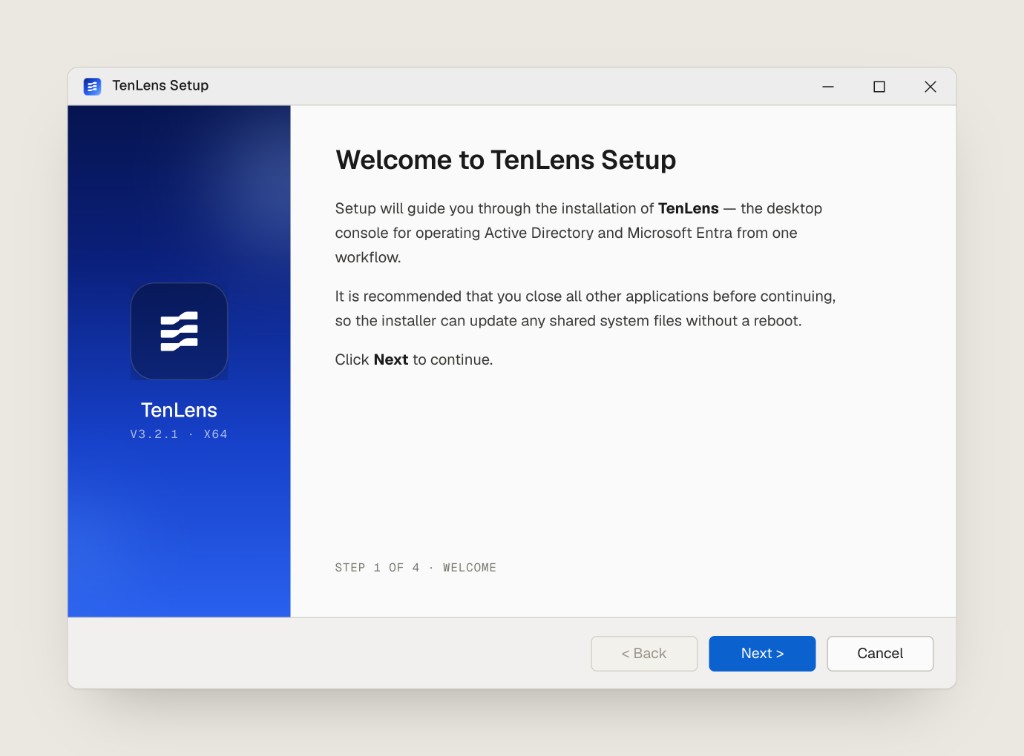
TenLens ships as a TenLens_<version>_x64-setup.exe installer. The setup wizard walks you through four steps.
- 1Welcome
Run the installer and review the welcome screen. Close other applications if you prefer a clean install path.
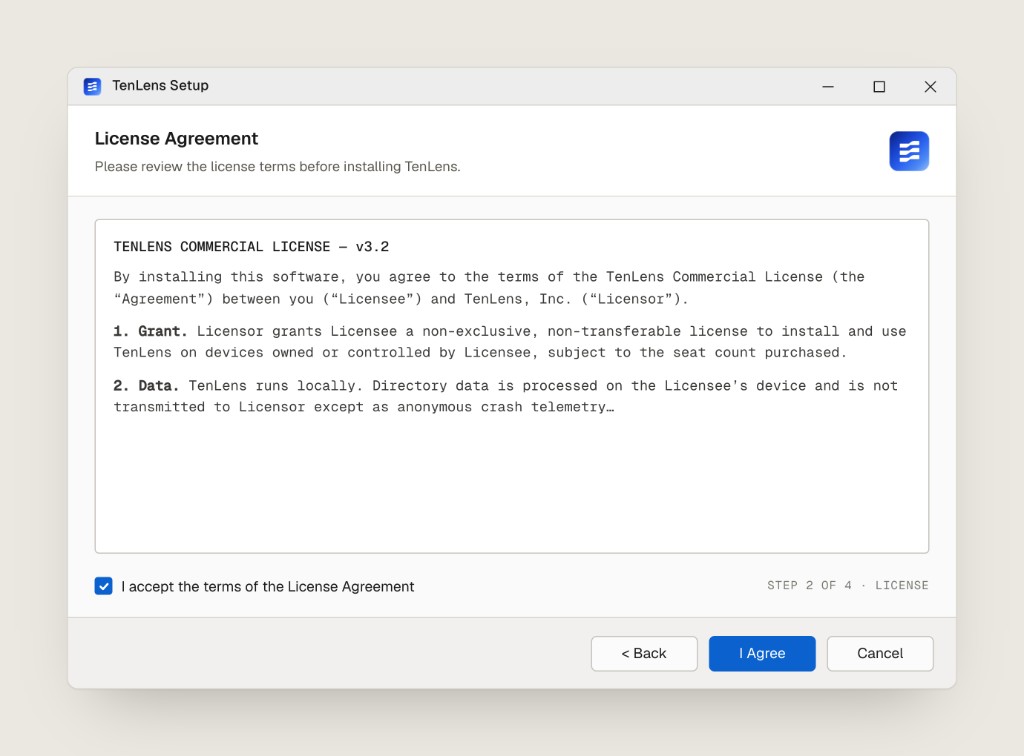
- 2License agreement
Read the TenLens commercial license, check I accept the terms of the License Agreement, then click I Agree.
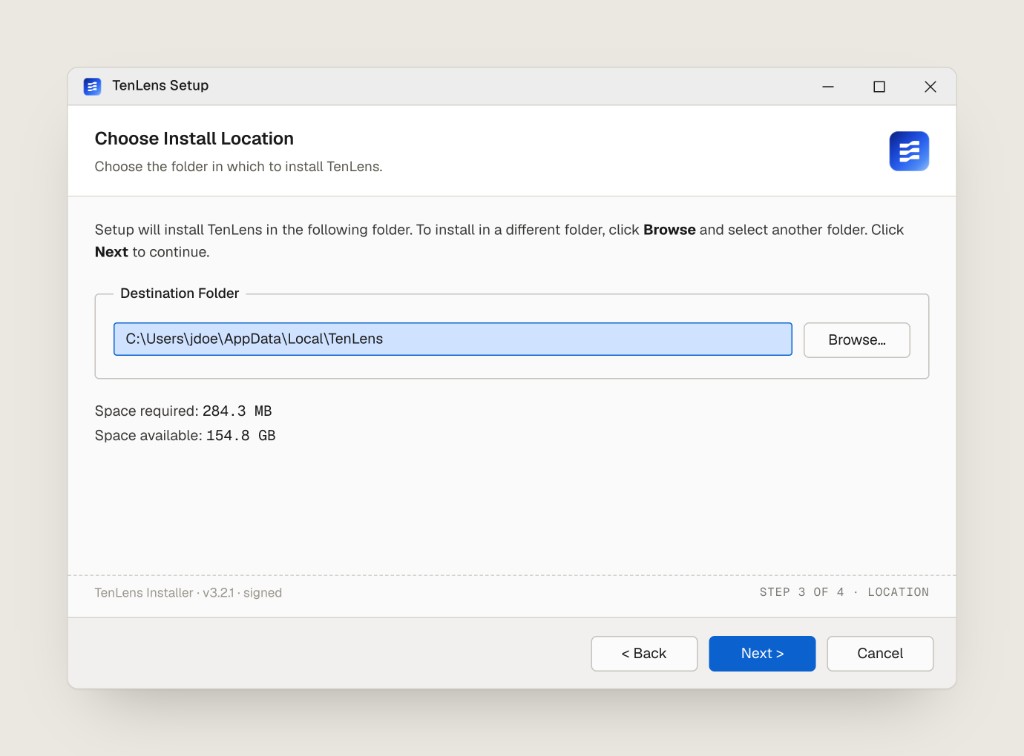
- 3Choose install location
Confirm the destination folder. The default is your local AppData profile. Click Browse to pick a different folder if needed, then Next.
- 4Finish
The installer copies files and verifies WebView2 if required. On the finish screen, leave Run TenLens checked to launch immediately, and optionally create a desktop shortcut.
Windows may show a SmartScreen prompt the first time you run a new publisher's installer. Choose More info, then Run anyway if you downloaded TenLens from an official TenLens channel.
Where files live
- Application:
%LOCALAPPDATA%\TenLens\ - User data:
%LOCALAPPDATA%\TenLens\(application support and cache under your profile) - Start menu shortcut: TenLens under your user Programs list
After install
When TenLens opens for the first time, the Desktop Launcher starts local services (embedded database and API) and prepares the app for use. This usually takes under a minute.
- 1Wait for services to start
The Overview tab shows Embedded database and TenLens application as Running when setup completes.
- 2Open TenLens
Click Open TenLens to launch the main console in your default browser.
You can confirm the installed version from the launcher header (for example, v3.2.1) or from Settings in the Desktop Launcher.
Troubleshooting
macOS: “TenLens cannot be opened”
If Gatekeeper blocks the app, open System Settings → Privacy & Security and click Open Anyway next to the TenLens message. Alternatively, right-click TenLens.app and choose Open once to bypass the warning.
Windows: installer will not start
Confirm you are on Windows 10 or 11 x64 and that the download completed fully. Re-download from the product page and compare the published SHA256 checksum if your organization requires it.
WebView2 missing or outdated
The Windows installer installs or updates WebView2 automatically when needed. If setup fails at that step, install the WebView2 runtime manually and re-run the TenLens installer.
Still stuck?
Open the Desktop Launcher Support tab and submit a ticket with Attach diagnostics bundle enabled. Include your platform and the installer version shown on the finish screen.